

How to Make Your Own Round Blue Cake: The Ultimate Guide for Every Sweet Occasion
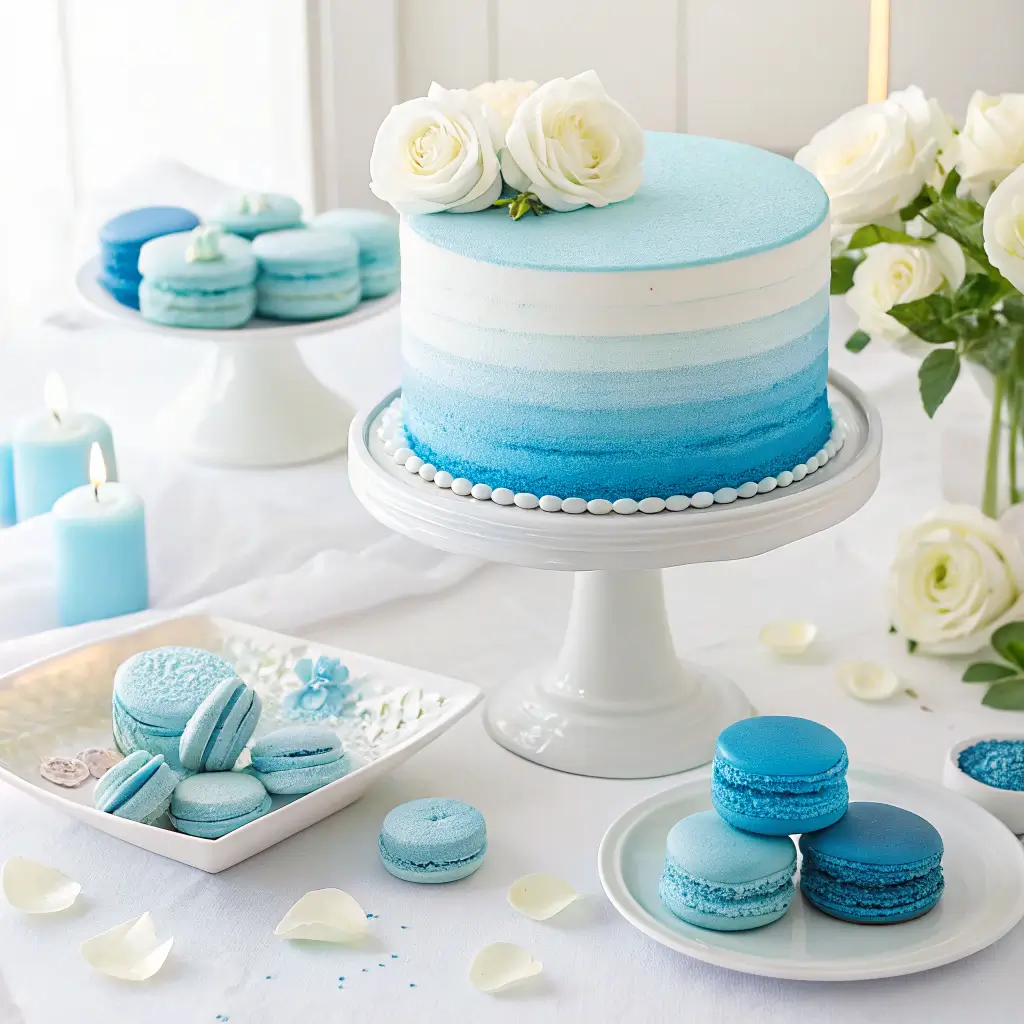
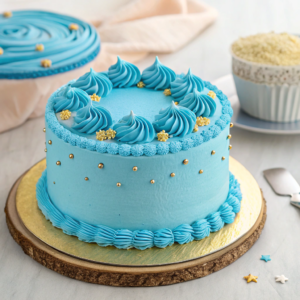
A round blue cake is more than just a dessert – it’s a stunning centerpiece that can transform any celebration into something truly memorable. Whether you’re planning a boy’s birthday party, a baby shower, or simply want to create a beautiful dessert with an eye-catching color, this comprehensive round blue cake recipe will guide you through every step of the process. From selecting the perfect cake base to achieving that vibrant blue color and elegant decorative touches, I’ll share professional techniques that will help you create a bakery-worthy cake at home.
Discovering the Versatile Appeal of Round Blue Cakes for Every Celebration
Blue cakes have become increasingly popular for various occasions, and their versatility makes them suitable for birthdays, gender reveals, weddings, and many other celebrations. The round shape, being the most classic cake design, provides the perfect canvas for showcasing this beautiful color. Moreover, a round blue cake for boys has become a particular favorite for children’s birthday parties and baby showers.
There are numerous ways to achieve this stunning blue aesthetic, from subtle baby blue to dramatic royal blue, and you can vary the design elements to match your specific occasion. The techniques I’ll share will help you create everything from a simple, elegant blue cake to more elaborate designs with decorative elements.If you prefer heart-shaped designs, our Pink Heart Shaped Cake: Classic Heart Cake guide offers similar techniques with a different shape.
Essential Ingredients and Equipment for Your Perfect Round Blue Cake Recipe
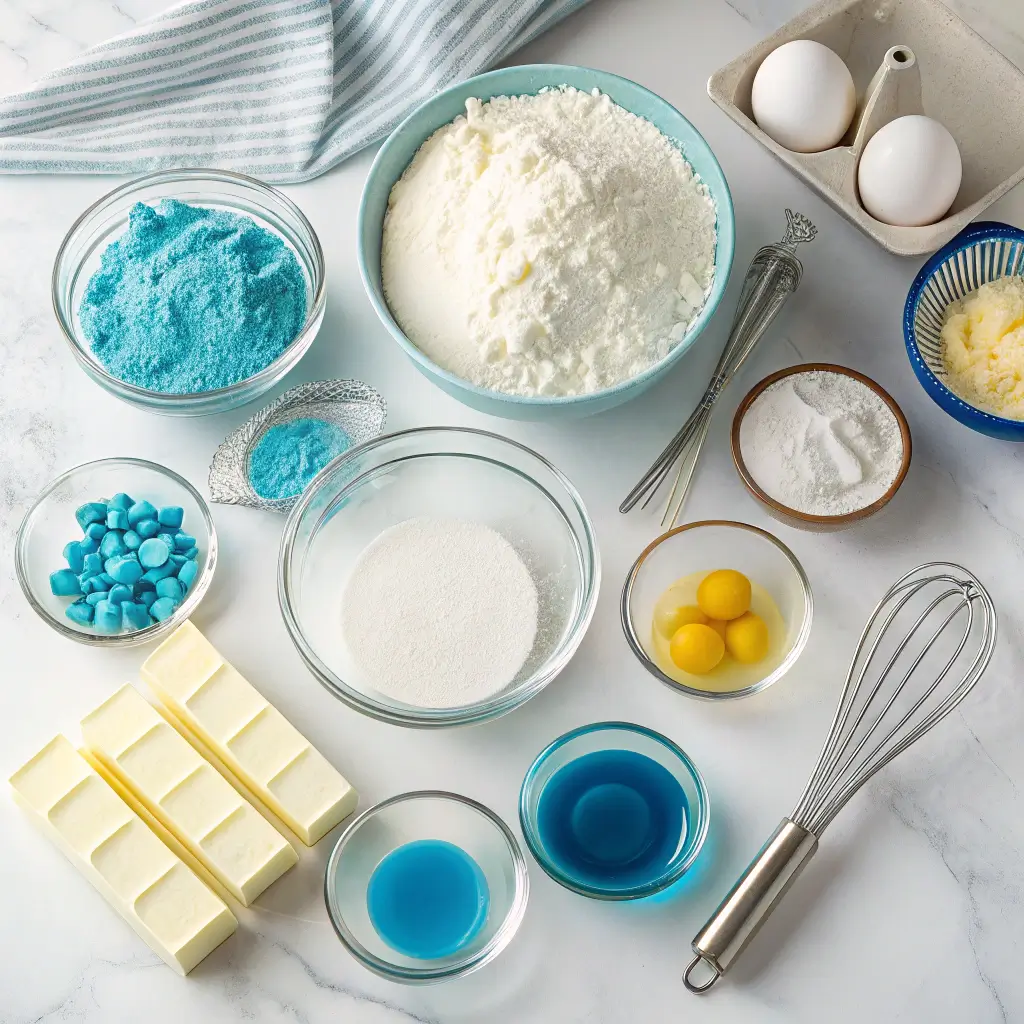
Before diving into the baking process, let’s gather all the necessary ingredients and equipment. Having everything ready will make the cake-making process a lot easier and more enjoyable.
Gathering Quality Ingredients for a Delicious Cake Base
For a successful round blue cake, you’ll need to select high-quality ingredients. The recipe below uses vanilla as the primary flavor, but you can easily adapt it to chocolate or lemon if you prefer. Here’s what you’ll need for the cake itself:
- 2¾ cups (345g) all-purpose flour
- 1½ teaspoons baking powder
- ¾ teaspoon baking soda
- ¾ teaspoon salt
- 1 cup (226g) unsalted butter, softened
- 1¾ cups (350g) granulated sugar
- 4 large eggs, room temperature
- 2 teaspoons pure vanilla extract
- 1 cup (240ml) buttermilk, room temperature
For the blue buttercream frosting:
- 1½ cups (340g) unsalted butter, softened
- 6 cups (720g) powdered sugar, sifted
- 3-4 tablespoons heavy cream or milk
- 2 teaspoons pure vanilla extract
- ¼ teaspoon salt
- Blue food coloring (gel recommended for vibrant results)
- Optional for natural coloring: 2-3 tablespoons butterfly pea powder
Must-Have Equipment for Professional-Looking Results
Having the right tools will make achieving that professional-looking round cake much easier:
- Two 8-inch round cake pans
- Parchment paper
- Electric mixer (stand or handheld)
- Mixing bowls (various sizes)
- Measuring cups and spoons
- Cooling rack
- Offset spatula
- Bench scraper for smooth sides
- Cake board (for serving and decorating)
- Piping bags and tips (if planning to decorate)
- Cake turntable (optional but helpful)
Baking the Perfect Round Cake: Step-by-Step Instructions
Now that we have all our ingredients and equipment ready, let’s dive into the step-by-step process of baking the perfect cake base for our blue masterpiece.
Preparing Your Baking Space and Ingredients
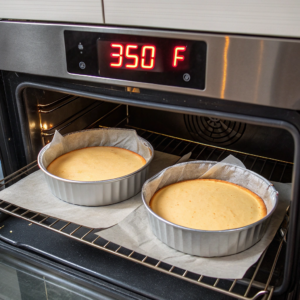
- Preheat and Prepare: Start by preheating your oven to 350°F (175°C). Meanwhile, grease your two 8-inch round cake pans and line the bottoms with parchment paper circles to ensure easy removal after baking.
- Mix Dry Ingredients: In a medium bowl, whisk together the flour, baking powder, baking soda, and salt until well combined. Set this mixture aside for now.
- Bring Ingredients to Room Temperature: Ensure your butter, eggs, and buttermilk are at room temperature. This helps them blend together more smoothly, resulting in a better cake texture.
Creating a Light and Fluffy Cake Batter
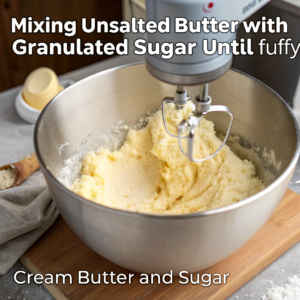
- Cream Butter and Sugar: In a large bowl using your electric mixer, beat the butter on medium speed until creamy (about 1 minute). Then, add the sugar and beat on medium-high speed until the mixture becomes pale and fluffy (approximately 3-4 minutes). Remember to scrape down the sides of the bowl as needed.
- Add Eggs and Vanilla: Add the eggs one at a time, beating well after each addition to ensure proper incorporation. Then, beat in the vanilla extract until just combined.
- Combine Wet and Dry Ingredients: With the mixer on low speed, add the dry ingredients in three additions, alternating with the buttermilk (beginning and ending with dry ingredients). Mix just until combined after each addition. Be careful not to overmix, as this can result in a tough cake.
Baking Your Round Cake Layers to Perfection
- Divide and Bake: Divide the batter evenly between your prepared cake pans. Use an offset spatula to smooth the tops. Place in the preheated oven and bake for 25-30 minutes, or until a toothpick inserted in the center comes out clean or with just a few moist crumbs.
- Cool Properly: Allow the cakes to cool in the pans for about 15 minutes, then carefully invert onto a wire cooling rack. Remove the parchment paper and allow the cakes to cool completely before frosting (at least 1 hour). This cooling step is crucial – frosting a warm cake will cause the buttercream to melt.
Creating the Perfect Blue Buttercream Frosting: Tips and Techniques
The blue frosting is what transforms this cake into a showstopper. Let’s explore how to create a smooth, vibrant blue buttercream that will make your cake truly stand out.

Mastering Basic Buttercream Techniques
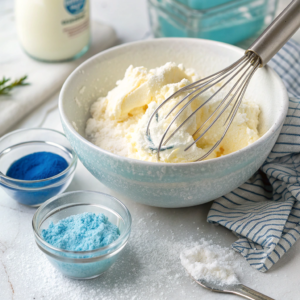
- Cream Butter Until Fluffy: In a large bowl using your electric mixer, beat the softened butter on medium-high speed until it becomes pale and creamy (about 3-4 minutes). This initial step is crucial for achieving a light, fluffy frosting.
- Add Sugar Gradually: Reduce the mixer speed to low and add the powdered sugar one cup at a time, mixing thoroughly after each addition. Scrape down the sides of the bowl as needed to ensure everything blends evenly.
- Incorporate Liquid Ingredients: Mix in the heavy cream, vanilla extract, and salt. Beat for an additional 2-3 minutes until the frosting is light and fluffy. The texture should be smooth and spreadable.
Achieving Various Shades of Blue Frosting for Different Occasions
The beauty of a blue cake lies in the versatility of the color itself. Here’s how to achieve different blue shades:
- Start Small: Begin with a small amount of gel food coloring (use a toothpick to add a tiny amount at first). Remember, you can always add more color, but you can’t take it away!
- Mix Thoroughly: Beat the frosting on medium speed to distribute the color evenly, ensuring there are no streaks.
- Build Color Gradually: Continue adding small amounts of color and mixing thoroughly until you reach your desired shade. Keep in mind that buttercream will often darken slightly as it sets.
- Shade Guide for Different Occasions:
- For a Baby Blue Cake (perfect for baby showers): Add just a tiny amount of blue coloring
- For a Sky Blue Cake (great for children’s birthdays): Add a moderate amount of blue coloring
- For a Royal Blue Cake (elegant for formal occasions): Add more blue with a tiny touch of violet to deepen the color
- For a Navy Blue Cake (sophisticated for adult celebrations): Add blue coloring plus a small amount of black or very dark purple
- Natural Blue Coloring Option: If you prefer to avoid artificial food coloring, butterfly pea powder is an excellent natural alternative. To use it, dissolve 2-3 tablespoons in 1 tablespoon of warm (not hot) water first, then add to the frosting gradually. Note that natural colorants typically yield more pastel shades rather than vibrant blues.
- professional bakers recommend for achieving vibrant royal blue colors
Troubleshooting Common Blue Frosting Issues
- For Vibrant Colors: Gel food coloring produces more intense colors than liquid coloring. Americolor Royal Blue and Wilton Blue are excellent brands that professional bakers recommend.
- Avoiding Streaky Color: Beat the frosting on medium-high speed for 2-3 minutes after adding color to ensure even distribution throughout.
- Buttercream Too Soft: If your frosting becomes too soft while working with it (common in warm kitchens), simply refrigerate for 10-15 minutes before continuing.
- Color Deepening Over Time: Blue will often intensify after sitting for several hours, so it’s a good idea to make the initial color slightly lighter than your target shade.
- Preventing Green Tints: If your blue cake starts turning green, it might be reacting with vanilla extract (which has a yellowish tint). To avoid this, consider using clear vanilla extract or white food coloring as a base.
Assembling and Decorating Your Round Blue Cake Like a Professional
Now comes the fun part – assembling and decorating your blue cake to create a stunning design that will impress everyone at your celebration.
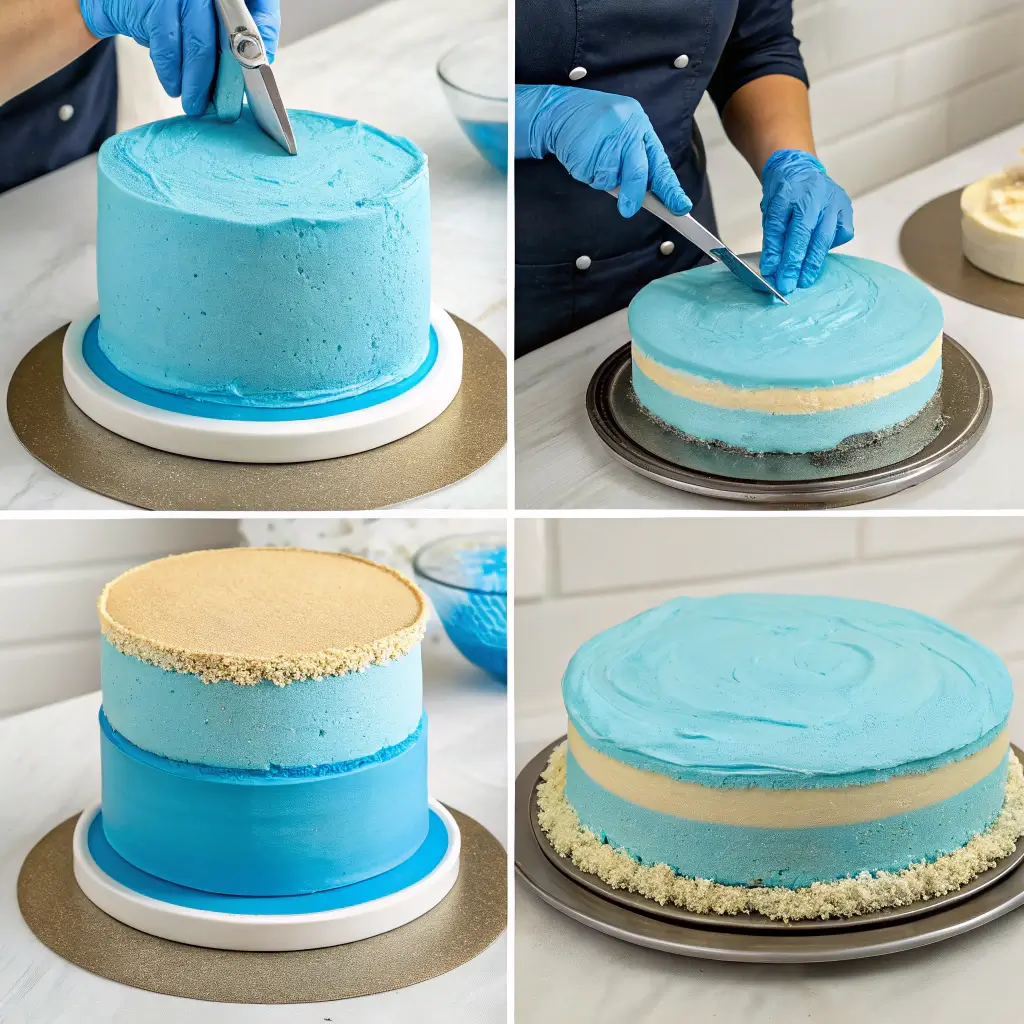
Basic Assembly Instructions for a Two-Layer Round Cake
- Level the Cakes: Once completely cooled, use a large serrated knife to level the tops of your cake layers if they have domed. This ensures a stable, even cake.
- Prepare Your Cake Board: Place a small dot of frosting on your cake board or serving plate to secure the cake.
- Fill the Cake: Place one cake layer on your serving plate or cake board. Spread about 1 cup of blue frosting evenly on top. For additional flavor, you can add a complementary filling like vanilla custard, chocolate ganache, or even crumbled Oreo or Biscoff cookies between layers.
- Apply a Crumb Coat: Place the second cake layer on top. Apply a thin layer of frosting over the entire cake (top and sides) to seal in any crumbs. This “crumb coat” ensures your final layer of frosting will remain clean and crumb-free.
- Chill Before Final Coat: Refrigerate the crumb-coated cake for 20-30 minutes to set. This makes applying the final coat much easier.
- Add Final Frosting Layer: Remove the cake from the refrigerator and apply the remaining blue frosting, creating a smooth, even layer on the top and sides.
Decorative Techniques to Enhance Your Blue Cake Design
- Achieving Smooth Sides for an Elegant Look:
- Use an offset spatula to apply frosting to the sides.
- Hold a bench scraper vertically against the side of the cake.
- Slowly rotate the cake stand while keeping the scraper steady to smooth the sides.
- Periodically clean your scraper for the smoothest finish.
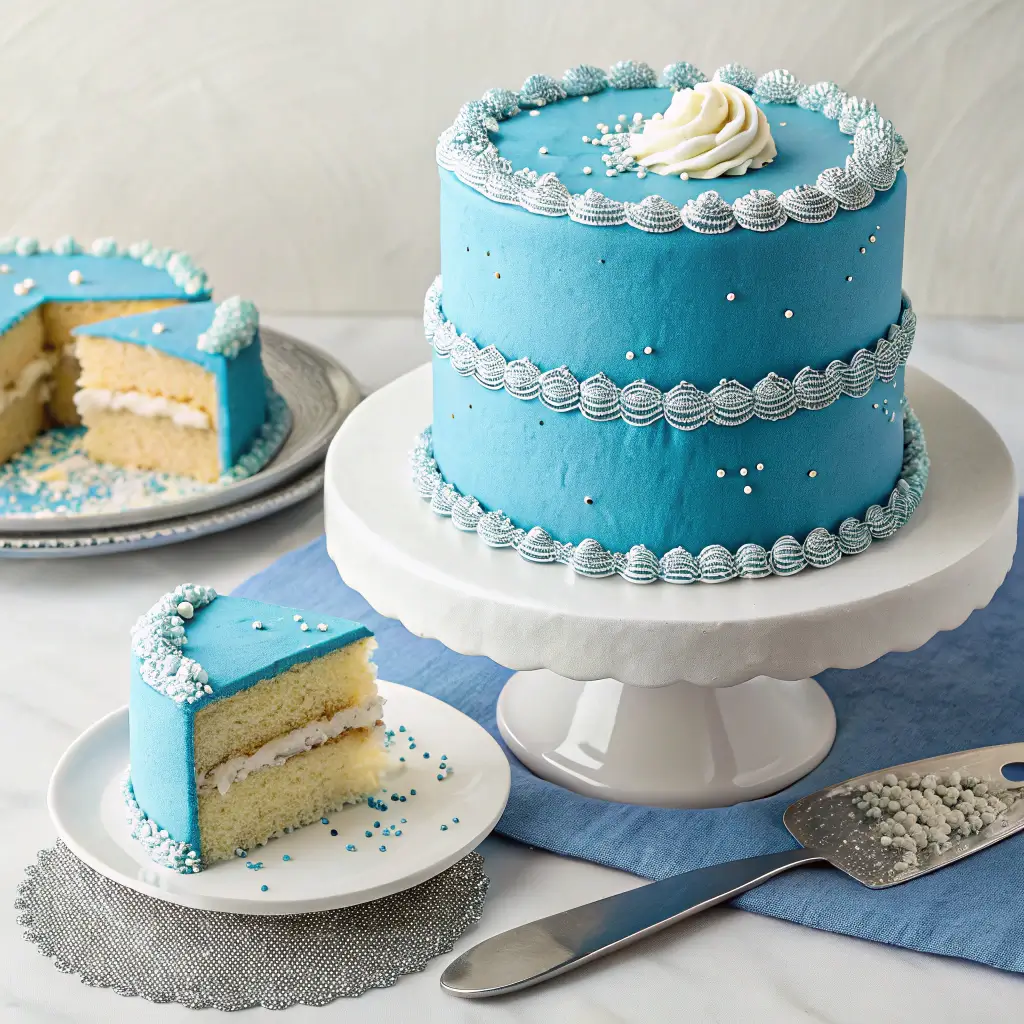
- Simple Piping Techniques for Beautiful Borders and Accents:
- Fill a piping bag fitted with your chosen tip (star tips #1M or #8B work well for borders and rosettes).
- For a basic border, pipe evenly spaced stars or shells around the top edge of the cake.
- For rosettes, start at the center of where you want your rosette and pipe in a spiral outward.
- For a more dynamic look, vary the sizes of your piped decorations.
- Creating a Stunning Blue Drip Effect for Modern Cake Aesthetics:
- Mix 1 cup white chocolate chips with ¼ cup heavy cream to make a ganache.
- Microwave in 30-second intervals, stirring each time until smooth.
- Add blue coloring to the white chocolate ganache.
- Let cool until slightly thickened but still pourable.
- Pour or spoon small amounts around the top edge of the chilled cake, allowing it to drip down the sides.
- Fill in the top of the cake with the remaining ganache, smoothing with an offset spatula.
- Additional Decorative Ideas for Special Occasions:
- For birthday cakes: Add sprinkles, edible glitter, or number candles
- For baby showers: Decorate with small fondant baby items or “It’s a Boy” toppers
- For weddings: Add white chocolate decorations or fresh flowers
- For a vintage look: Use piped pearls and lace patterns in white over the blue
- For vintage-inspired decoration ideas, check out our Heart Shaped Cakes: Vintage Bakery article for techniques that work beautifully on round cakes too.
Customer Reviews and Inspiration: Real-World Blue Cake Success Stories
Many bakers, both amateur and professional alike, have discovered the joy of creating round blue cakes for various occasions. Here are some customer reviews and success stories to inspire your own blue cake creation:
“I made this round blue cake for my son’s 16th birthday, and everyone was stunned by how professional it looked! The royal blue color was perfect, and the vanilla buttercream was delicious. Thank you for the helpful tips on achieving smooth sides – mine turned out just like the pictures!” – Sarah K.
“Used this recipe to make a blue cake for a baby shower, and it was a huge hit! The natural coloring option using butterfly pea powder gave a lovely soft blue that was perfect for the occasion. Will definitely make again!” – Michael T.
“As someone with a dairy allergy, I appreciated the suggestion to blend in alternative milk options. I made this with oat milk and vegan butter, and the cake was still super moist and delicious. The blue color came out gorgeous!” – Jamie L.
Frequently Asked Questions About Round Blue Cakes
What Flavour is Blue Cake?
Blue cake can be any flavor you prefer – the blue color comes from the frosting or food coloring added to the batter. Most commonly, blue cakes are vanilla, white, or chocolate flavored, as these provide the best base for showing off the blue color. For our recipe, we’ve used a classic vanilla cake that pairs beautifully with the blue buttercream frosting.
What is a Circle Cake Called?
A circle cake is typically called a round cake. Round cakes are the most traditional shape for cakes and are baked in circular pans that come in various sizes (6-inch, 8-inch, 9-inch, etc.). Layer cakes made with round pans are the most common type used for birthdays, weddings, and other special occasions.
What is Blue Cake Made Of?
Blue cake is made of the same ingredients as any other cake – typically flour, sugar, eggs, butter, and leavening agents. What makes it blue is either food coloring added to the batter itself or, more commonly, blue frosting covering the exterior. For the most vibrant results, gel food coloring is recommended, though natural options like butterfly pea powder can create more subtle blue hues.
How Do You Make a Navy Blue Cake?
To make a navy blue cake, start with a base of royal blue gel food coloring in your frosting. Then, add small amounts of black or very dark purple food coloring to deepen the shade until you achieve the desired navy color. Remember that the color will often intensify after setting for a few hours, so make it slightly lighter than your target shade initially.
How Do You Make a Cake Blue Naturally?
To make a cake blue naturally without artificial food coloring, butterfly pea flower powder is the best option. This powder comes from dried butterfly pea flowers and creates a beautiful blue color when mixed with water. For frosting, dissolve 2-3 tablespoons in a small amount of warm water before adding to your buttercream. For the cake batter itself, you can steep butterfly pea flowers in hot milk, let it cool, then use in your recipe.
Why Does My Blue Cake Turn Green?
Blue cakes sometimes turn green due to the interaction between blue food coloring and yellow-tinted ingredients like vanilla extract or butter. To prevent this, use clear vanilla extract instead of brown, and consider adding a tiny bit of violet or purple food coloring to counteract any yellow tones. Additionally, some baking powders can cause a reaction that shifts the color – using aluminum-free baking powder can help.
How Do You Make Indigo Cake Color?
To create an indigo cake color, start with a royal blue base in your frosting, then add a small amount of violet or purple gel food coloring. Gradually adjust until you achieve the deep blue-purple shade characteristic of indigo. Remember that colors typically deepen as they set, so make your initial mix slightly lighter than your target shade.
This round blue cake is perfect for birthdays, gender reveals, ocean-themed parties, baby showers, or any celebration that calls for a striking, colorful centerpiece! With these instructions and tips, you’ll be able to create a beautiful blue cake that not only looks professional but tastes delicious too. Happy baking! 💙
Round Blue Cake
Equipment
- 2 8-inch round cake pans Required for baking cake layers.
- 2 parchment paper circles For lining cake pans.
- 1 Electric Mixer To cream butter and sugar.
- 3 Mixing bowls (various sizes) for mixing ingredients.
- 1 Set measuring cups and spoons For accurate ingredient measurementsz
- 1 Cooling Rack For cooling cakes.
- 1 Offset Spatula For smoothing frosting.
- 1 Bench Scraper For smoothing cake sides.
- 1 Cake board For assembly and serving.
- 1 Piping bag and tips For decorative frosting application.
- 1 Cake turntable Optional for easier frosting application.
Ingredients
Cake Batter:
- 2.75 cups all-purpose flour 2¾ cups all-purpose flour
- 1.5 tsp baking powder 1½ teaspoons baking powder
- 0.75 tsp baking soda ¾ teaspoon baking soda
- 0.75 tsp salt ¾ teaspoon salt
- 1 cup unsalted butter softened Unsalted butter, softened
- 1.75 cups granulated sugar Granulated sugar
- 4 large eggs room temperature Eggs at room temperature
- 2 tsp pure vanilla extract Pure vanilla extract
- 1 cup buttermilk room temperature Buttermilk at room temperature
Blue Buttercream Frosting:
- 1.5 cups unsalted butter softened Unsalted butter, softened
- 6 cups powdered sugar sifted Powdered sugar, sifted
- 3-4 tbsp heavy cream or milk Heavy cream or milk as needed
- 2 tsp pure vanilla extract Pure vanilla extract
- 0.25 tsp salt Salt
- Blue food coloring gel Recommended blue gel food coloring
- 2-3 tbsp butterfly pea powder For natural blue color optional
Instructions
- Preheat oven to 350°F and prepare cake pans by greasing them and lining bottoms with parchment paper.
- In a bowl, whisk together flour, baking powder, baking soda, and salt.2.75 cups all-purpose flour 2¾ cups all-purpose flour, 1.5 tsp baking powder 1½ teaspoons baking powder, 0.75 tsp baking soda ¾ teaspoon baking soda, 0.75 tsp salt ¾ teaspoon salt
- In a large bowl, cream unsalted butter and granulated sugar until light and fluffy.1 cup unsalted butter, 1.75 cups granulated sugar Granulated sugar
- Add eggs one at a time, beating well after each addition, then mix in vanilla extract.4 large eggs room temperature Eggs at room temperature, 2 tsp pure vanilla extract Pure vanilla extract
- Alternately add the dry ingredients and buttermilk to the creamed mixture, starting and ending with the dry ingredients.1 cup buttermilk room temperature Buttermilk at room temperature
- Divide the batter evenly into the prepared pans and bake for 25-30 minutes until a toothpick comes out clean.

- Allow cakes to cool in pans for 15 minutes, then invert onto a cooling rack to cool completely.
- For the frosting, beat unsalted butter until creamy, then gradually add powdered sugar, heavy cream, vanilla extract, and salt.1.5 cups unsalted butter, 6 cups powdered sugar, 3-4 tbsp heavy cream or milk Heavy cream or milk as needed, 2 tsp pure vanilla extract Pure vanilla extract, 0.25 tsp salt Salt
- Gradually add blue food coloring (or optional butterfly pea powder) to achieve the desired blue shade.Blue food coloring gel Recommended blue gel food coloring, 2-3 tbsp butterfly pea powder For natural blue color
- Level the cooled cake layers, apply a thin crumb coat over the entire cake, and refrigerate for 20-30 minutes.
- Apply the final layer of frosting smoothly with an offset spatula; decorate as desired.
Notes
- Ensure all ingredients are at room temperature for best results.
- Avoid overmixing the batter to maintain a light and fluffy texture.
- Cool cakes completely before frosting to prevent melting.
- Adjust blue food coloring gradually to achieve the perfect shade.
- Use butterfly pea powder for a natural, pastel blue hue if desired.