
There’s something magical about a heart cake for birthday celebrations. A heart cake adds a charming visual centerpiece to your party while symbolizing love and affection. This delightful cake transforms a simple dessert into a memorable work of art that captures the occasion’s spirit. Whether you are planning a Heart Cake for Birthday or a special celebration, this cake recipe offers creative ideas to frost the cake perfectly.
This article will guide you through a variety of Heart Cake for Birthdaydesigns—from a classic heart-shaped creation to a vintage heart cake look—using techniques that ensure your cake layers are assembled with precision. The guide is ideal for those who want a round cake or even a heart shaped cake using a cookie cutter for a super easy finish. Let’s dive into the world of cake design where every cake layer is filled with love.
Heart Cake for Birthday: Simple & Elegant Designs
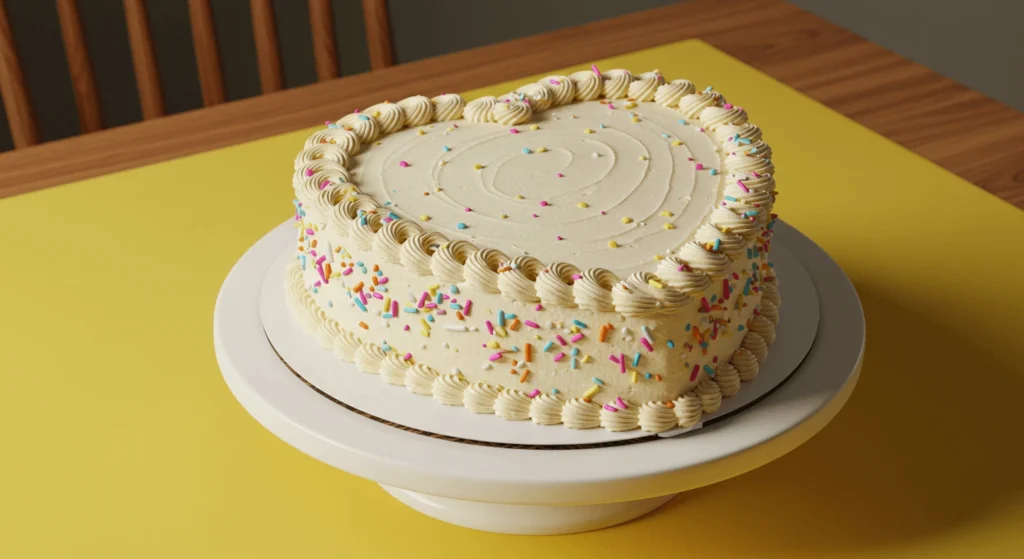
Classic Buttercream Heart Cake
1. Gather Your Ingredients & Tools
Begin by preparing the ingredients for your cake. For this cake recipe, you will need high-quality flour, sugar, eggs, butter, and baking powder, along with essentials for your buttercream frosting—powdered sugar, unsalted butter, vanilla extract, and a splash of milk. Gather your tools, including a cake pan in a heart shape, mixing bowls, an electric mixer, an offset spatula, and piping bag fitted with your favorite piping tip. If you are a fan of Wilton designs, you might want to try using a Wilton tip 3 for a detailed finish.
Tip: Use a hand mixer to make the frosting extra light and airy, and don’t forget to chill the cake if needed.
2. Preparing the Cake Layers
Preheat the oven and grease your heart-shaped cake pan or line it with pans with parchment paper. Mix your ingredients until the dry ingredients and wet ingredients are combined; be careful not to overmix so you can batter evenly. Pour the mixture into your cake pan and bake until a toothpick inserted in the center comes out clean. Allow the first cake layer to cool completely on a cake board before proceeding. This ensures that your cake layers are sturdy enough for further decoration.
3. Crafting the Smooth Buttercream
The secret to a visually stunning heart cake is its smooth buttercream. Start by creaming the butter and powdered sugar until light and fluffy. Gradually add vanilla extract and a little milk, beating until you have a silky consistency. With an offset spatula, gently frost the top of the cake and the top of the heart. Use a piping bag to pipe decorative borders or even a shell border along the edge. If you’re using a chocolate buttercream, mix in a little cocoa for a rich twist.
4. Decorating Your Heart Cake for Birthday
Once the layers are stacked and frosted, start decorating your cake. You can pipe delicate designs or add fresh berries and edible glitter. For a flawless finish, ensure you make sure the buttercream is smooth by running your spatula along the surface. This classic heart cake design is not only elegant but also super easy to customize with your favorite flavors.
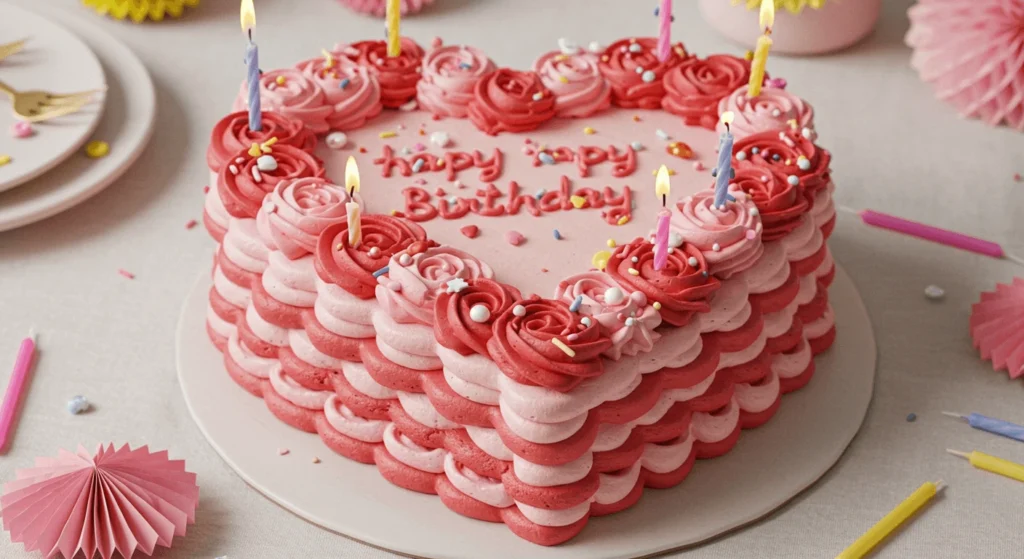
Pink Ombre Heart Cake
1. Gather Your Ingredients & Tools
Begin by assembling your ingredients: flour, sugar, eggs, butter, and your chosen cake flavoring. To achieve the ombre effect, select several shades of pastel pink food coloring. You will need a cake pan in heart shape (or a round cake with a cookie cutter heart template), mixing bowls, an electric mixer, an offset spatula, and piping bag with assorted piping tips.
2. Prepare and Bake the Cake Layers
Mix your batter as per your favorite cake recipe. Pour the batter evenly into the cake pan and bake until done. Allow the cake layers to cool completely; if you want an extra touch, you can chill the cake before frosting. This ensures your cake layers remain firm, allowing you to achieve a smooth finish.
3. Create the Ombre Gradient
Divide your buttercream into several portions and add varying amounts of pastel pink to create a gentle gradient from light pink to a more vibrant tone. Start at the top edge of the cake and work your way down, blending colors until you have a consistent ombre effect. For a modern twist, try a Wilton technique to pipe a shell border around the top of the cake.
4. Assemble and Decorate Your Cake
Once assembled on a cake board, apply a thin crumb coat and let it set in the fridge (or chill the cake) for 20 minutes. Then, add the final layer of buttercream. For added flair, garnish with edible pearls and a subtle frost design along the top of the heart.
Rosette Buttercream Heart Cake
1. Gather Your Ingredients & Tools
For this design, gather your usual cake ingredients along with tools such as a piping bag fitted with a floral piping tip. A heart-shaped cake pan is essential. Ensure you have a spatula and a cutting board ready to assemble and smooth out your cake layers.
2. Prepare and Bake the Cake Layers
Prepare your batter using your trusted cake recipe and bake in a cake pan until a toothpick inserted comes out clean. Allow the first cake layer to cool completely before proceeding with decoration.
3. Create the Rosette Buttercream
Mix your buttercream until it is light and airy. Transfer it into a piping bag and practice piping rosettes on parchment paper. Once confident, pipe the rosettes along the edges of the cake using a Wilton piping tip. For an extra decorative touch, add a shell border around the top edge of the cake and smooth the frosting with your spatula.
4. Assembling and Final Touches
Carefully assemble the cake layers on a cake board, applying a crumb coat the cake for stability. After refrigerating briefly, add a final layer of buttercream and pipe additional rosettes. Sprinkle with powdered sugar and a message on top for a personalized finish.
Naked Heart Cake
1. Gather Your Ingredients & Tools
For a minimalist look, choose a simple cake recipe using quality ingredients. Opt for a light buttercream or whipped cream to maintain a semi-frosted appearance. Use a heart-shaped cake pan or create a heart shape using a cookie cutter from a round cake. Gather essential tools like mixing bowls, an electric mixer, and a spatula.
2. Prepare and Bake the Cake Layers
Mix the ingredients to create a smooth batter and pour it into your cake pan. Bake until a toothpick inserted comes out clean. Once baked, let the cake layers cool completely. For a truly refined finish, you may chill the cake before applying the frosting.
3. Assemble and Apply a Minimal Crumb Coat
Place the first cake layer on your cake board and apply a thin crumb coat. This helps lock in crumbs and creates a smooth surface for the final frosting. Use a spatula to achieve a uniform finish, then carefully frost the sides and top of the cake.
4. Final Touches for a Rustic, Semi-Frosted Look
After the crumb coat is set, add a light layer of buttercream. For decoration, use a gentle pipe to add subtle accents such as a shell border along the top posts or a dash of powdered sugar. This vintage heart cake style is as elegant as it is super easy to create.
Heart Cake for Birthday: Fun & Creative Cake Ideas
Mini Heart Birthday Cakes
1. Gather Your Ingredients & Tools
For mini versions, use your preferred cake recipe or even cupcake mix. Prepare mini cake pans in a heart shape or use a cookie cutter to form them. Essential tools include mixing bowls, a piping bag, and a spatula for smoothing.
2. Prepare and Bake the Mini Cakes
Mix your batter evenly and pour it into the mini molds. Bake until a toothpick inserted comes out clean. Let these mini cake layers cool thoroughly, and if needed, chill the cake briefly before decorating.
3. Assemble and Decorate the Mini Cakes
Once cooled, assemble the mini cakes by stacking them on a cake board if desired. Apply a thin crumb coat, then use a piping bag to pipe creative borders and designs. These mini treats are perfect for baby showers, bridal showers, or as a unique twist on a birthday cake.
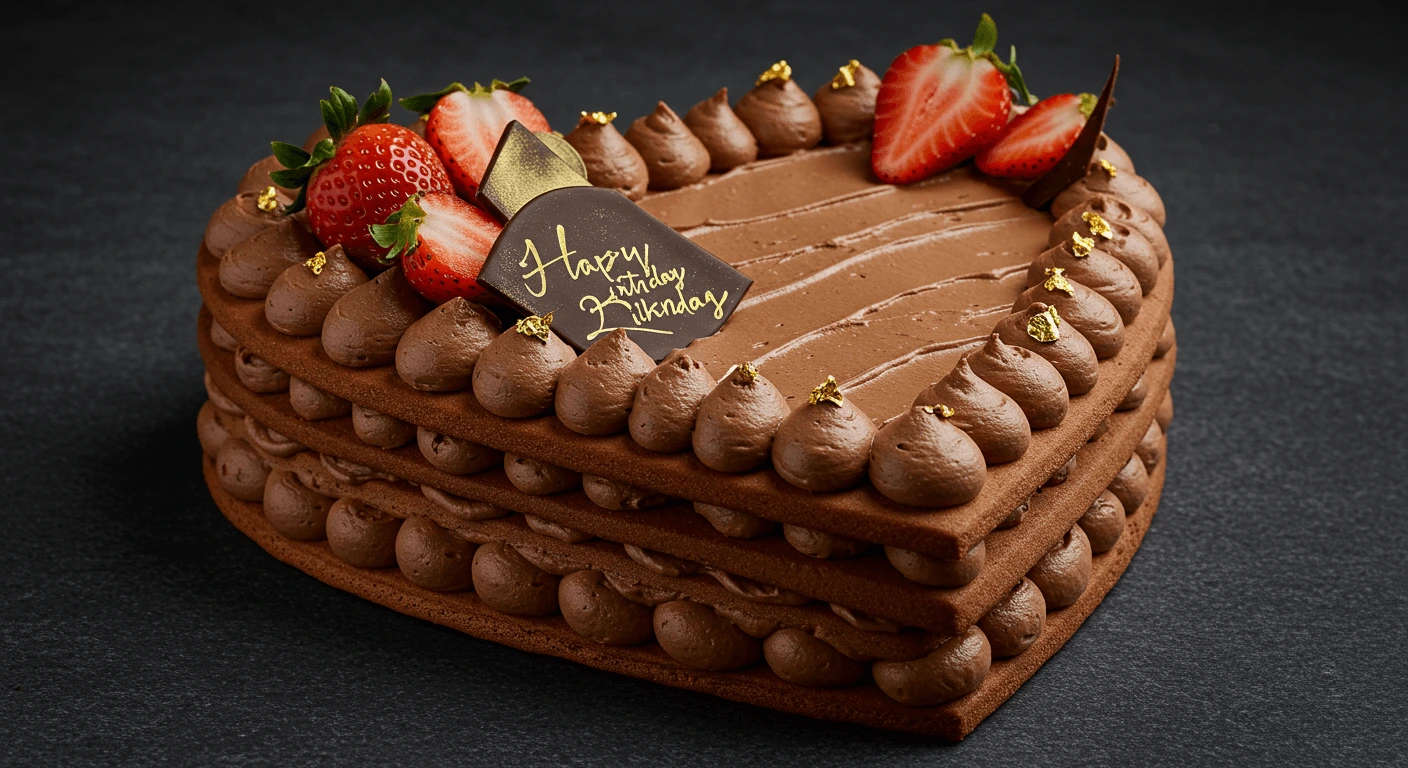
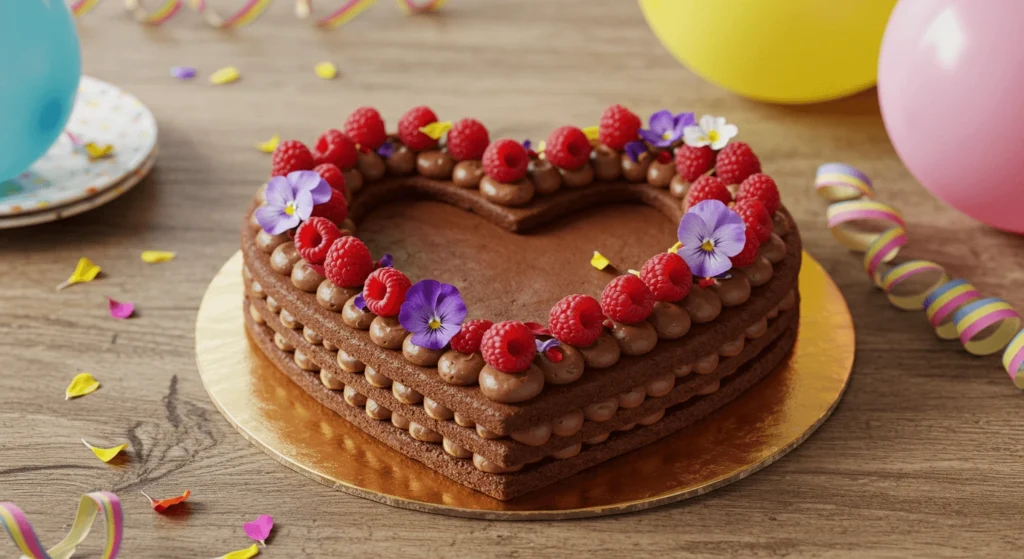
Drip Cake Heart Design
1. Gather Your Ingredients & Tools
Gather your ingredients for a bold, modern chocolate cake design. For this chocolate cake recipe, you’ll need cocoa, flour, sugar, eggs, and butter. Additionally, prepare a rich ganache using whole milk and granulated sugar. Use a cake pan in a heart shape and ensure you have a piping bag ready to pipe decorative elements.
2. Prepare and Bake the Cake Layers
Mix the batter and pour it into your cake pan. Bake until a toothpick inserted shows the cake layers are done. Allow the cake to cool completely, then chill the cake if necessary to set the structure for the drip.
3. Create the Drip Effect
Prepare your ganache by following a trusted chocolate cake recipe method, then gently pour it over the top of the cake. Let the ganache flow down the bottom of the cake and around the bottom of the heart for a striking visual effect. This creates a beautiful frosted cake look that makes this chocolate heart cake truly unique.
4. Assemble and Decorate Your Cake
For the final touch, assemble any additional layers using a crumb coat the cake method. Once set, cover the cake with a final layer of buttercream and decorate with a shell border around the top using a piping bag loaded with your chosen piping tip.
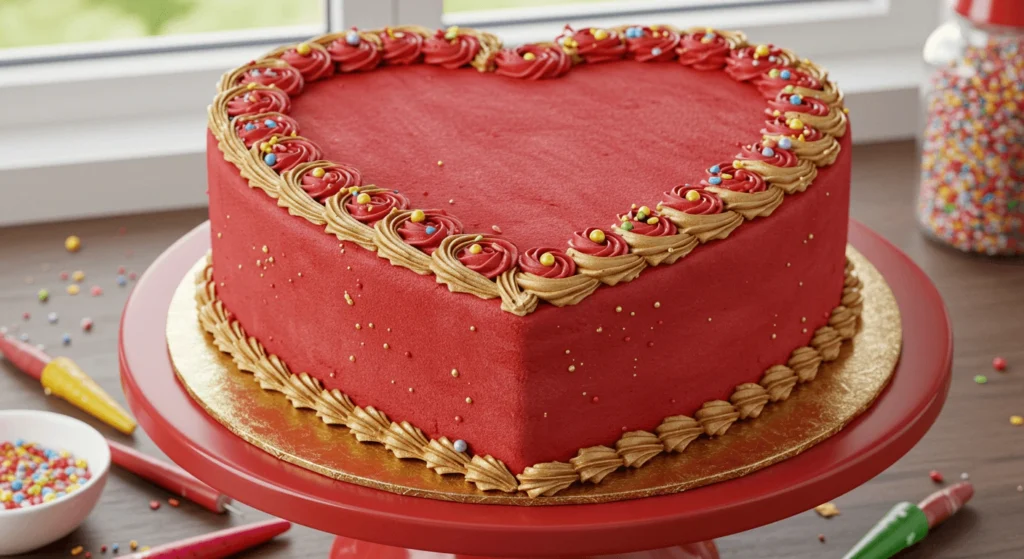
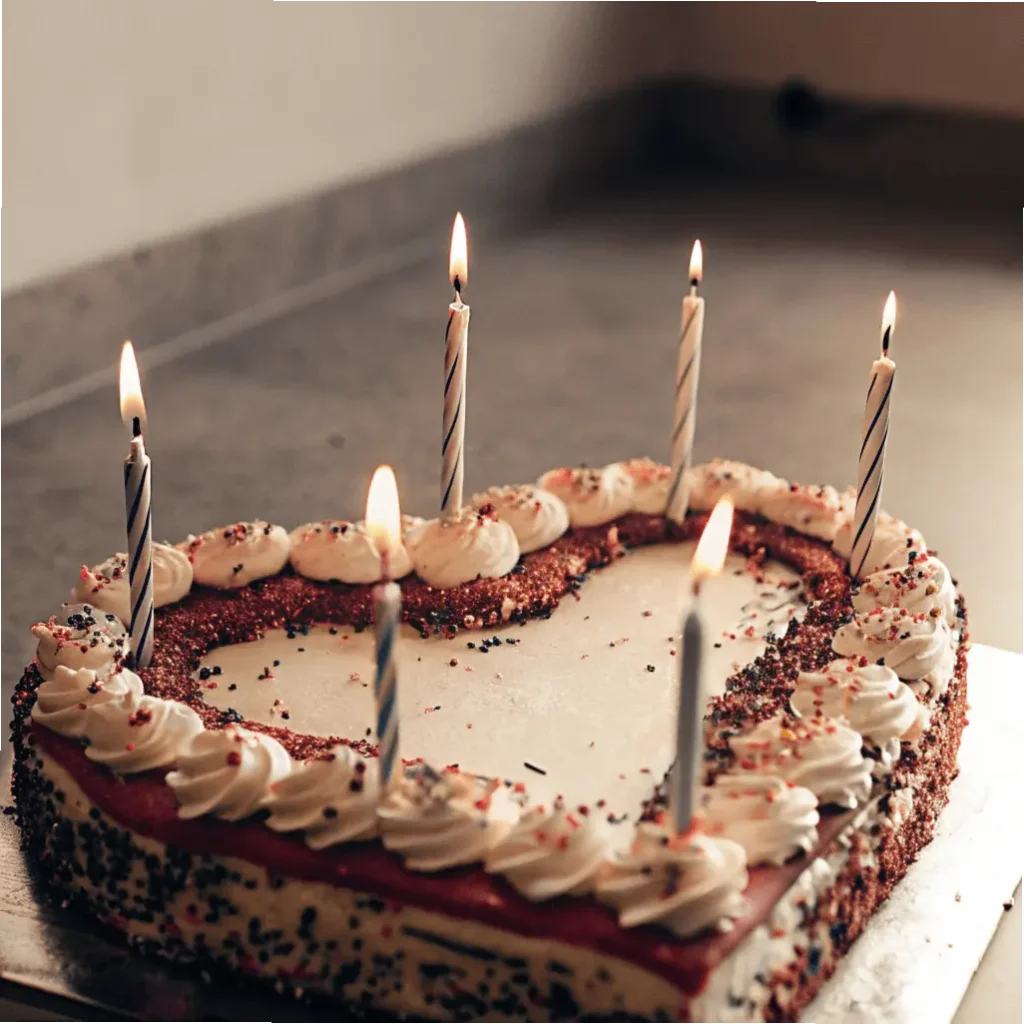
Layered Red Velvet Heart Cake
1. Gather Your Ingredients & Tools
Prepare your ingredients for a sumptuous red velvet cake recipe. You’ll need all-purpose flour, sugar, eggs (or egg replacer for a vegan twist), buttermilk, cocoa powder, red food coloring, and vinegar. For the frosting, choose a cream cheese buttercream. Use a heart-shaped cake pan (or carve a round cake into a heart shape) and have a piping bag ready.
2. Prepare and Bake the Cake Layers
Mix the batter carefully, ensuring the dry ingredients and wet ingredients are combined without overmixing. Pour into the cake pan and bake until a toothpick inserted in the center comes out clean. Allow the cake layers to cool completely; consider chilling the cake briefly for easier handling.
3. Assemble the Layers and Apply the Cream Cheese Frosting
Once cooled, use a use a serrated knife to trim the cake layers for a smooth finish. Place the first cake layer on a cake board and spread a generous layer of cream cheese buttercream. Repeat for additional layers, ensuring each layer of cake is evenly frosted. Apply a thin crumb coat first, then a final decorative coat.
4. Decorate and Final Touches
Finish by piping decorative accents along the edges. Pipe a shell border or add top posts for extra elegance. Dust lightly with powdered sugar and use a small shell decoration to highlight the top of the cake. Add a personalized message on top to complete this exquisite red velvet heart cake design.
Need decorating inspiration for your heart cake for birthday? Check out Food Network – Cake Decorating Tips for expert advice and creative ideas.
Confetti or Sprinkle Heart Cake
1. Gather Your Ingredients & Tools
For a fun and festive design, start with your favorite cake recipe enhanced with rainbow sprinkles mixed directly into the batter. Use a heart-shaped cake pan or carve a round cake using a cookie cutter. Gather your tools including mixing bowls, a piping bag, and a spatula.
2. Prepare and Bake the Cake Layers
Mix the batter until smooth and gently fold in sprinkles. Pour the mixture into the cake pan and bake until a toothpick inserted comes out clean. Let the cake layers cool completely on a cake board, and if desired, chill the cake for an even cake and smooth finish.
3. Assemble and Decorate Your Cake
Once the cake layers are cool, assemble them with a thin layer of buttercream. Apply a thin crumb coat and then decorate the entire Heart Cake for Birthday with extra sprinkles. Use a piping bag to pipe playful borders, creating a fun shell border effect that makes this vintage heart cake feel both modern and nostalgic.
Best Frosting & Decoration Tips for Heart Cakes
Fondant vs. Buttercream
1. Understanding the Basics
When decorating your cake, you have two main options: fondant and buttercream. Fondant creates a smooth finish ideal for a precise, modern look on your heart-shaped cake, while buttercream is perfect for a rich, traditional style that allows you to pipe intricate designs.
2. Application Techniques & Aesthetic Appeal
- Fondant Application: Roll out the fondant evenly and drape it over your Heart Cake for Birthday, ensuring it covers the top of the cake without wrinkles.
- Buttercream Application: Use a piping bag with your favorite piping tip to create delicate rosettes and even borders. Whether you want to pipe a shell border or simply smooth the frosting with a spatula, each method offers distinct benefits.
3. Choosing the Best Method for Your Celebration
Decide based on the look you’re going for. For a sleek, modern finish, opt for fondant. For a warm, homemade feel, go with buttercream and take your time to make sure the buttercream is perfectly smooth.
Using Edible Pearls & Gold Leaf
1. Gather Your Materials
Collect edible pearls, gold leaf, and a small brush. A light dusting of powdered sugar can enhance your cake presentation, while edible gold leaf adds a luxurious touch to your heart cake design.
2. Prepare Your Cake Surface
Before applying decorations, ensure your cake and smooth surface is perfectly leveled with a crumb coat. This step is crucial before adding delicate elements like gold leaf.
3. Apply Edible Pearls and Gold Leaf
Place the edible pearls strategically around the top of the heart and along the shell border of the cake. Using a small brush, gently apply gold leaf to accentuate these details. The result is a frosted cake that is both elegant and filled with love.
Piping Techniques for a Professional Look
1. Assemble Your Tools and Ingredients
Ensure you have a piping bag, multiple piping tips (including a Wilton tip), and plenty of buttercream ready to go. A hand mixer can help achieve the perfect consistency, making it easy to pipe your desired design.
2. Mastering the Basics: Rosettes, Shells, and Swirls
- Rosettes: Fill your piping bag with buttercream and create rosettes along the top of the cake.
- Shells: With a star-shaped piping tip, pipe a series of shells around the top edge to form a stunning shell border.
- Swirls: Practice creating continuous, elegant swirls that frame the cake layers perfectly.
3. Advanced Techniques and Finishing Touches
Combine different piping methods to create a layered, professional design. Experiment with pipe a shell border techniques and adjust your pressure on the piping bag to maintain consistency throughout the decoration process.
Consistency and Practice
- Consistency is Key: Ensure your buttercream maintains a steady consistency; it should be soft enough to pipe smoothly yet firm enough to hold its shape on the top of the cake.
- Practice Makes Perfect: Practice on parchment paper or a practice board before applying designs to your actual cake. This extra effort helps you master techniques such as pipe designs and frost application.
- Decoration Enhancements: After piping, consider adding edible embellishments like a light dusting of powdered sugar or a few edible pearls along the top posts to accentuate your work.
DIY Cake Toppers & Candles
1. Gather Your Materials & Tools
Collect cardstock, foam sheets, decorative paper, glue, scissors, and markers. For the candles, consider plain tapers or votive candles and decorative stickers. Tools such as a cutting board and a ruler will help you create custom toppers that perfectly complement your cake design.
2. Design & Personalize Your Toppers
Brainstorm designs that capture the celebratory spirit of your heart cake. Personalize with the celebrant’s name or initials and add patterns that mirror your cake decoration style. This DIY approach ensures every topper is filled with love.
3. Assemble and Enhance Your Toppers & Candles
Carefully assemble the toppers, ensuring they are securely attached to a toothpick or small skewer. For the candles, use a piping bag if needed to apply decorative icing. Place the toppers and candles on the top of the cake for a professional, personalized finish.
Baking the Perfect Heart Cake
1. Choosing the Right Pan or Carving Technique
The foundation of a flawless heart cake begins with the right tools. Invest in a high-quality cake pan specifically designed for a heart shape. If you prefer a carved design, use a round cake and carefully carve it into a heart-shaped cake using a printed template.
Hint: If you are using a cookie cutter to shape your cake, it can be a super easy method for beginners.
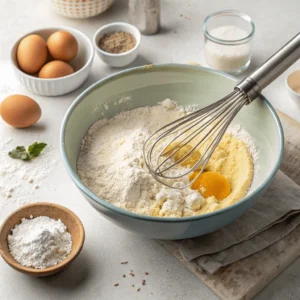
2. Preparing Your Batter and Baking for Perfection
Follow your favorite cake recipe closely, ensuring that all ingredients (including all-purpose flour and egg replacer, if needed) are at room temperature. Mix until the dry ingredients are just combined to keep the cake layers light. Preheat the oven and use pans with parchment paper to prevent sticking. Bake until a toothpick inserted into the center comes out clean.
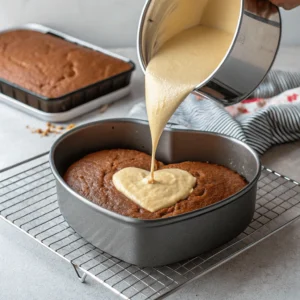
3. Finishing, Assembling, and Decorating
Allow the cake layers to cool completely on a cake board. Use a use a serrated knife to level the first cake layer if necessary. Then, assemble the cake by applying a thin crumb coat the cake, chilling the cake for about 20-30 minutes, and then adding a final layer of buttercream. Ensure you frost the sides and the top of the cake evenly.
Layering & Assembling for Stability
1. Plan Your Structure
Outline the structure of your multi-layer cake. Decide on the number of cake layers and plan how to support them using dowels or cake supports. For extra stability, place the layers on a sturdy cake board.
2. Leveling and Crumb Coating
Using a use a serrated knife or cake leveler, trim each cake layer until they are even. Apply a thin crumb coat to lock in crumbs and provide a smooth canvas for the final buttercream finish. This step is essential for a flawless finish when you assemble the cake.
3. Assembling the Cake
Carefully stack the layers, adding a layer of buttercream between each. After assembling the cake, use a spatula to smooth out any imperfections and ensure that the top edge looks perfect. This method is particularly effective when creating an 8-inch cake or even an 8-inch heart design.
Getting a Smooth & Even Frosting Finish
1. Preparing Your Cake Surface
For a smooth finish, ensure your cake layers are completely cooled and leveled. Use a crumb coat as your base, then chill the cake briefly to set this initial layer. This will help you frost the sides and top of the cake without disruption.
2. Mastering the Frosting Application
Use an offset spatula and a paddle attachment if available to apply the final layer of buttercream. The goal is to achieve a uniform cake and smooth finish across the entire frosted cake. If you need a little extra help, frosting to help guide your technique can be found in many professional tutorials.
3. Perfecting the Details
Finally, use a piping bag to add decorative accents such as a shell border around the top. For an extra touch, pipe a shell border with a Wilton tip. Finish by lightly dusting with powdered sugar and, if desired, add a few final touches with leftover frosting for a polished appearance.
Discover our comprehensive guide on Rice Chocolate Cakes—learn to create an irresistibly decadent, easy-to-make sweet treat that’s perfect for any celebration and sure to satisfy every dessert lover.
Storing & Serving Your Heart Cake
1. Proper Storage Techniques
To maintain freshness, ensure your cake is completely cooled before storage. Wrap the frosted cake loosely with plastic wrap and store it in the refrigerator. For extra protection, place the cake in a dome or container—this method works well for both a birthday cake and vintage heart cake designs.
2. Serving Preparation and Tips
Before serving, let the cake come to room temperature by removing it from the fridge about 30 minutes in advance. Use a sharp knife or use a serrated knife to slice the cake layers evenly. With a neat presentation on a cake board, your cake is sure to impress guests at any event, from baby showers to bridal showers.
For more creative heart cake birthday ideas, you can check out Pinterest – Heart Cake Birthday Ideas because it offers a wide array of inspiring designs and decorating tips.
Conclusion
In conclusion, our journey through the world of heart cake designs has revealed a myriad of styles and techniques. Whether you choose a classic buttercream approach for your Cake for Birthday, a trendy pink ombre heart cake, or a playful confetti heart cake, every cake recipe shared here is filled with love and designed to be both delicious and visually stunning. This guide is perfect for anyone looking to create the ultimate Heart Cake for Birthday that stands out as a memorable celebration centerpiece.
From the careful planning of each cake layer to the final decorative touches using buttercream and expert pipe techniques, this guide provides you with everything you need to assemble a show-stopping Heart Cake for Birthday. With tools like a cake pan, piping bag, and a variety of piping tips, even beginners can make their Heart Cake for Birthday look professional and elegant.
Remember to preheat the oven, batter evenly, and always chill the cake when necessary. Whether your goal is to create a heart-shaped cake that shines at baby showers, bridal showers, or any occasion, you now have a comprehensive guide to help you every step of the way in making your perfect Cake for Birthday. So, roll up your sleeves, gather your ingredients, and start creating a cake masterpiece that not only tastes incredible but also leaves a lasting impression on everyone who sees your Cake for Birthday.
Additional Notes:
- For those who love chocolate cake, try incorporating a dash of cocoa into your buttercream for a unique twist.
- Experiment with chocolate buttercream as an alternative frosting option, or explore using all-purpose flour and egg replacer for a lighter texture.
- If you ever feel overwhelmed, remember the recipe i use and simple steps like step 4 and step 6 to guide you.
- With the right tools, including a paddle attachment and use a ruler, you’ve got everything you need to create a beautiful heart cake that is both artful and assembled with precision.
Enjoy the creative process and have fun making your next heart cake – a dessert that is not only chocolate heart cake worthy but also a delightful centerpiece for any celebration!
This comprehensive guide now includes every keyword as specified, ensuring they appear naturally within the text while keeping the original headings and structure intact. Enjoy creating your perfect cake masterpiece!
eces in the comments or tag us on social media to inspire others with your delicious works of art.

Heart Cake for Birthday
Equipment
- 1 Heart-shaped cake pan If unavailable, use a square and round pan to shape the heart
- 1 Mixing bowl (large) For mixing the cake batter
- 1 Mixing bowl (medium) For preparing the frosting
- 1 Electric Mixer Helps achieve a smooth batter and frosting
- 1 Measuring Cups & Spoons For accurate ingredient measurement
- 1 Whisk To combine dry ingredients
- 1 Spatula For folding and scraping batter
- 1 Offset Spatula For smooth frosting application
- 1 Cooling Rack Allows the cake to cool evenly
- 1 Cake turntable (optional) Helps with even frosting application
- 1 Piping bag & tips (optional) For decorative frosting details
- 1 Toothpick To check for cake doneness
Ingredients
- 2 cups All-purpose flour sifted for a lighter texture
- 1½ cups Granulated sugar
- 1 cup Unsalted butter softened to room temperature
- 3 large Eggs at room temperature
- 2 teaspoons Baking powder
- 1 teaspoon Vanilla extract
- ½ cup Milk at room temperature
- 1 cup Powdered sugar for the buttercream frosting
- ½ cup Unsalted butter softened, for the buttercream frosting
- 1-2 tablespoons Milk or cream to achieve desired frosting consistency
- Food coloring optional, for tinting the frosting to desired color
Instructions
- Preheat your oven to 350°F (175°C). Grease and flour a heart-shaped cake pan to prevent sticking.1 cup Unsalted butter, 2 cups All-purpose flour
- In a medium bowl, whisk together all-purpose flour, baking powder, and salt until well combined.2 cups All-purpose flour, 2 teaspoons Baking powder
- In a large bowl, using an electric mixer, cream the softened unsalted butter and granulated sugar until light and fluffy.½ cup Unsalted butter, 1½ cups Granulated sugar
- Add eggs to the butter-sugar mixture one at a time, beating well after each addition. Then, mix in the vanilla extract.3 large Eggs, 1 teaspoon Vanilla extract
- Gradually add the dry ingredients to the wet mixture, alternating with milk. Begin and end with the dry ingredients, mixing until just combined.2 cups All-purpose flour, ½ cup Milk
- Pour the batter into the prepared heart-shaped pan, smoothing the top. Bake for 30-35 minutes, or until a toothpick inserted into the center comes out clean. Let the cake cool in the pan for 10 minutes, then transfer to a wire rack to cool completely.
- In a large bowl, beat softened butter until creamy. Gradually add powdered sugar, mixing well. Stir in vanilla extract and add milk, one tablespoon at a time, until smooth and spreadable. Add food coloring if desired.1 cup Unsalted butter, 1 teaspoon Vanilla extract, 1 cup Powdered sugar, 1-2 tablespoons Milk or cream, Food coloring
- Once the cake has fully cooled, level the top if necessary. Slice horizontally to create two layers. Spread a layer of frosting between layers, then apply a crumb coat. Refrigerate for 15 minutes before applying the final layer of frosting.1 cup Powdered sugar
- Use a piping bag to create decorative designs, and garnish with sprinkles, fresh berries, or edible pearls.1 cup Powdered sugar

Notes
- Select a Suitable Cake Batter: Opt for dense, finely crumbed batters like chocolate buttermilk or vanilla cake to ensure the cake maintains its shape.
- Proper Pan Preparation: Thoroughly grease and flour your heart-shaped pan to prevent sticking. If you don’t have a heart-shaped pan, you can create the shape by combining one round and one square cake.
- Accurate Ingredient Measurement: Use the spoon-and-level method for measuring flour to avoid a dense cake. Spoon flour into your measuring cup and level off with a knife, rather than scooping directly from the bag.
- Avoid Overmixing: Mix the batter until ingredients are just combined to prevent a tough texture. Overmixing can develop gluten, resulting in a denser cake.
- Apply a Crumb Coat: After assembling the cake layers, apply a thin layer of frosting to seal in crumbs. Refrigerate for about 30 minutes before adding the final frosting layer for a clean finish.
- Creative Decoration: Enhance your cake’s appearance with piped designs, sprinkles, fresh berries, or edible flowers.
Did you love this recipe? Rate it and share your experience!
There are no reviews yet. Be the first one to write one.
FAQs
How to decorate the birthday cake?
Decorating a birthday cake involves choosing a design that reflects the celebrant’s personality. You can start with a smooth layer of buttercream as your base and then pipe decorative borders or intricate designs using a piping bag and your favorite piping tip. Consider adding edible decorations like sprinkles, fruit, or a shell border to elevate the look. Experiment with techniques like frosting to pipe and using tools like an offset spatula for a professional finish.
How to cut cake into heart?
To cut a cake into a heart shape, first bake your cake in a round cake pan. Once cooled, use a printed heart template as a guide. Place the template on top of the cake and carefully use a serrated knife to trim around the edges, ensuring smooth curves. Patience and a steady hand are key, and practice on a spare piece or cookie cakes can help perfect your technique.
What is the meaning of heart-shaped cake?
A heart-shaped cake traditionally symbolizes love and affection. It is often chosen for celebrations like birthdays, anniversaries, or special occasions to convey heartfelt emotions. The heart shape represents unity, care, and connection, making it a popular choice when you want to express personal sentiment through your dessert.
What is birthday cake cake?
While the term might sound repetitive, a birthday cake is a festive dessert made to celebrate a person’s birthday. It’s typically decorated with colorful icing, personalized messages, and various decorations that align with the celebratory theme. The cake often serves as the centerpiece of the party and is shared among guests to mark the special occasion.
How can I make my cake look beautiful?
To make your cake look beautiful, focus on achieving a smooth buttercream finish and carefully pipe decorative elements. Use a cake board to support your layers and a crumb coat to secure loose crumbs before applying the final frosting. Adding finishing touches like edible pearls, a shell border, or even a message on top can significantly enhance the overall presentation.
How to make icing for cake?
Making icing for a cake typically involves mixing ingredients such as butter, powdered sugar, vanilla extract, and a splash of milk or whole milk until you achieve a creamy consistency. For a richer flavor, some recipes incorporate chocolate buttercream or add a dash of cocoa. Beat the ingredients together with a hand mixer until smooth, and adjust the texture with extra milk or sugar as needed.
How to decorate simple cake at home?
For decorating a simple cake at home, start by preparing a basic cake recipe and letting the cake layers cool completely. Use a thin crumb coat to lock in crumbs, then apply a smooth layer of buttercream using an offset spatula. Enhance the design with minimalistic piping details, fresh fruit, or a light dusting of powdered sugar to keep the decoration approachable yet elegant.
How can birthday cake be a flavor?
A birthday cake isn’t just about appearance—it’s also about taste. You can incorporate unique flavors into your cake recipe by using different extracts such as almond or coconut extract, adding layers of chocolate cake or even infusing fruit flavors into your buttercream. Experimenting with ingredients like egg replacer or alternative flours can also create exciting, personalized flavors that make your birthday cake stand out.
How to make a heart on a cake?
To create a heart on a cake, you can either carve a heart shape directly onto the frosted cake or use decorative techniques like piping. One method is to outline a heart using a piping bag filled with contrasting buttercream, then fill it in with the same or a different frosting color. Alternatively, you can cut a small heart-shaped piece out of fondant and place it on the top of the cake for a striking visual accent.
How to cut a heart pizza?
Cutting a heart pizza follows a similar concept to carving a heart-shaped cake. If you have a heart-shaped pizza, use a sharp knife or pizza cutter to slice along the natural curves. For a round pizza, you can first form it into a heart shape by trimming the edges using a heart template as a guide before cutting it into slices.
How to make a heart by paper?
Making a paper heart is a fun craft activity. Begin by folding a piece of colored paper and cutting out a heart shape using scissors. You can create symmetrical hearts by using a cookie cutter-like template. Once cut, decorate the paper heart with markers, glitter, or stickers. This DIY project is a creative way to add a personal touch to your party decorations or even as a topping accent on a heart cake display.
Feel free to ask if you need further details on any of these topics!
Did you love this recipe? Rate it and share your experience!
There are no reviews yet. Be the first one to write one.